Nested virtualization and 2 public IPv4 Addresses
Instructions for the installation of Proxmox and OPNsense on a KVM server with VMX Flag
I use a powerfull server for this Howto. The server has 16 cores and 64 GB Ram as well as 3 TB SSD storage.
However, these instructions should also work on any other server with nested virtualization.
No advertising the server was not provided to me for free, I do this just for fun.
Inhaltsverzeichnis
Install Debian 11 Netinstall
- English / German Keymap
- Servername proxmox.yourdomain.tld
- root use a strong password
- user yourusername use a strong password
- LVM Setup full space / one partition
- only SSH Server and standard system utilities
- grub on sda
Post Install Debian 11
Warning:
NO CHANGES on Network Interfaces !!!!
If you make the adjustments to /etc/network/interfaces before installing Proxmox, you can still access your server via VNC Console in the best case. But it is also possible that this requires a new installation of the server.
edit .ssh/config
Host [CONFIG NAME]
    Hostname [SERVER_IP]
    User [USERNAME]
    Port 22
    IdentityFile ~/.ssh/[SSH_KEY]
add key for ssh
ssh-copy-id -i .ssh/SSH_KEY.pub [USERNAME]@[SERVER_IP]
Install Packages
su #Password for root user
apt update && apt upgrade -y
apt install sudo mc htop bridge-utils net-tools ifupdown2 -y
/sbin/usermod -aG sudo [USERNAME]
Reboot
systemctl reboot
Proxmox VE install
Based on the Proxmox tutorial and with the help of my good colleague (name not mentioned for privacy reasons).
Promox Tutorial
Change to root
sudo -i
Edit /etc/hosts
remove 127.0.1.1 and add [SERVER_IP] like this
127.0.0.1       localhost
192.168.15.77   prox4m1.proxmox.com prox4m1
Add Proxmox Repository
echo "deb [arch=amd64] <http://download.proxmox.com/debian/pve> bullseye pve-no-subscription" > /etc/apt/sources.list.d/pve-install-repo.list
Add Proxmox Key (as root or sudo)
wget https://enterprise.proxmox.com/debian/proxmox-release-bullseye.gpg -O /etc/apt/trusted.gpg.d/proxmox-release-bullseye.gpg
Begin installation
Update and Upgrade System
apt update && apt full-upgrade -y
First install pve-kernel-5.15 (this will be replaced later by the kernel pve-kernel-5.4.203)
apt install pve-kernel-5.15 -y
systemctl reboot
After reboot
uname -r
5.15.74-1-pve
Install Proxmox VE packages
apt install proxmox-ve postfix open-iscsi -y
Remove Debian Kernel
apt remove linux-image-amd64 'linux-image-5.10*'
Update and check grub2 config
root@proxmox:~# update-grub
Install pve-kernel-5.4.203-1
Why I use a 5.4LTS kernel here?
I have tested many different kernels in this combination. And although the 5.4.LTS kernel is no longer shipped with Debian Bullseye and is not recommended for Proxmox VE, I have had the best experience with it and can definitely guarantee that it worked at the time I wrote the howto.
wget http://download.proxmox.com/debian/pve/dists/buster/pve-no-subscription/binary-amd64/pve-kernel-5.4.203-1-pve_5.4.203-1_amd64.deb
dpkg -i pve-kernel-5.4.203-1-pve_5.4.203-1_amd64.deb
Add pve-kernel-5.4.203 as default
pve-efiboot-tool kernel list
Ausgabe:
Manually selected kernels:
None.Automatically selected kernels:
5.15.74-1-pve
5.4.203-1-pve
pve-efiboot-tool kernel pin 5.4.203-1-pve
Ausgabe:
Setting ‚5.4.203-1-pve‘ as grub default entry and running update-grub.
Generating grub configuration file …
Found linux image: /boot/vmlinuz-5.15.74-1-pve
Found initrd image: /boot/initrd.img-5.15.74-1-pve
Found linux image: /boot/vmlinuz-5.4.203-1-pve
Found initrd image: /boot/initrd.img-5.4.203-1-pve
Warning: os-prober will not be executed to detect other bootable partitions.
Systems on them will not be added to the GRUB boot configuration.
Check GRUB_DISABLE_OS_PROBER documentation entry.
done
pve-efiboot-tool kernel list
Ausgabe:
Manually selected kernels:
None.Automatically selected kernels:
5.15.74-1-pve
5.4.203-1-pvePinned kernel:
5.4.203-1-pve
Add pve-no-subcription repository
attach to /etc/apt/sourclist.d/pve-no-subscription.list
# PVE pve-no-subscription repository provided by proxmox.com,
# NOT recommended for production use
deb <http://download.proxmox.com/debian/pve> bullseye pve-no-subscription
Update and Upgrade after Install and Reboot the System
apt update && apt upgrade -y
systemctl reboot
Post Proxmox Install ToDo’s
Call Proxmox Frontend in Browser
- https://[SERVER_IP]:8006
Create Interface
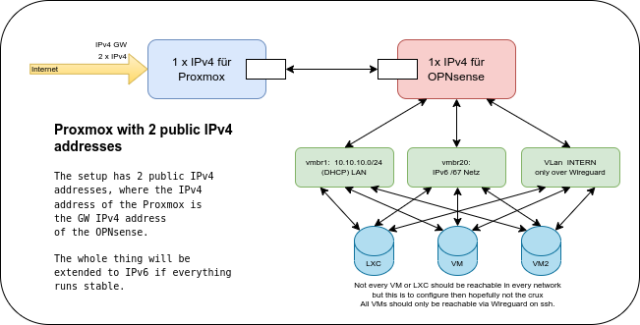
The interfaces can be created via the frontend or via the /etc/network/interfaces , personally I recommend to do this via the console (SSH access). For this example you need 2 IPv4 addresses.
source /etc/network/interfaces.d/*
auto lo
iface lo inet loopback

auto ens3
iface ens3 inet manual

auto vmbr0
iface vmbr0 inet static
    address [MAIN_IPv4]/22
    gateway [GATEWAY_IPv4]
    bridge-ports ens3
    bridge-stp off
    bridge-fd 1
    pointopoint [MAIN_IPv4]
    bridge_hello 2
    bridge_maxage 12
    bridge_maxwait 0
    post-up sysctl -w net.ipv4.ip_forward=1
    post-up ip route add [SECOND_IPv4]/32 dev vmbr0

auto vmbr1
iface vmbr1 inet static
    address 10.10.10.2/24
    bridge-ports none
    bridge-stp off
    bridge-fd 0
    pre-up ethtool -G eno1 rx 1024 tx 1024
    pre-up ethtool -K eno1 tx off gso off
    post-up ethtool -K vmbr1 tx off gso off
    post-up sysctl -w net.ipv4.ip_forward=1
    post-up iptables -t nat -A POSTROUTING -s '10.10.10.0/24' -o vmbr0 -j MASQUERADE
    post-down iptables -t nat -D POSTROUTING -s '10.10.10.0/24' -o vmbr0 -j MASQUERADE
This is only an example, moreover the IPv6 config is still missing here.
Certificates for Proxmox
Datacenter / ACME
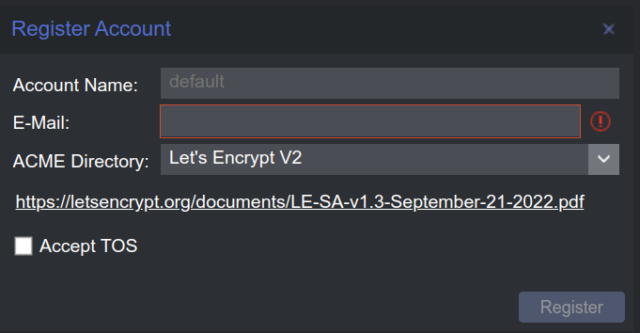
- Accounts ADD
- Account Name: Example.com
- E-Mail: [email protected]
- ACME Directory: Let’s Encrypt V2
- Register
Challenge Plugins ADD
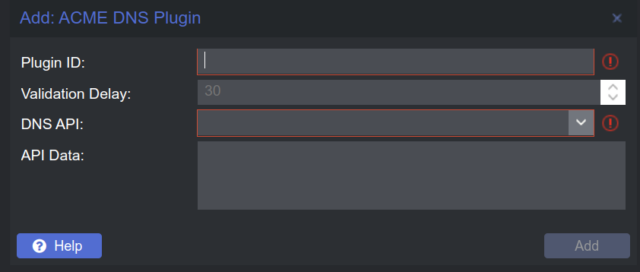
DNS API choice: Example Cloudflare Managed DNS
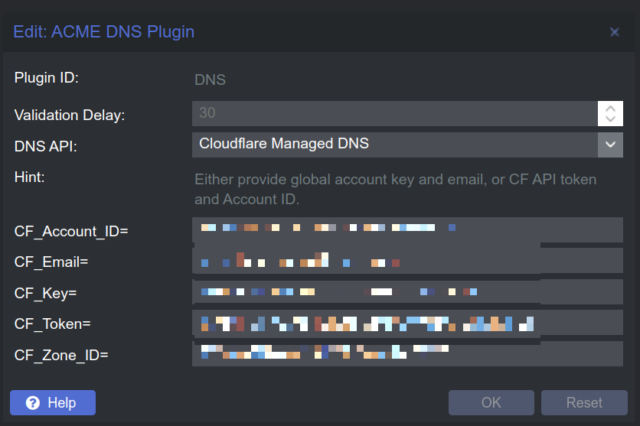
Fill all Fields with valid data.
=> Add
Proxmox / System / Certificates
- ACME / Add
- Challenge Type: HTTP or DNS (wildcard ssl cert needs DNS Plugin)
- Domain: your Domain or Subdomain if you set Default Domain under
Preparations for OPNsense VM installation under Proxmox
- upload opnsense iso
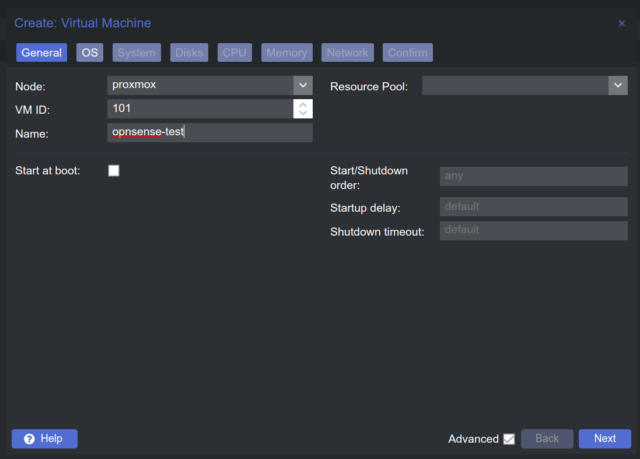
- Create VM
- General: give your VM a name
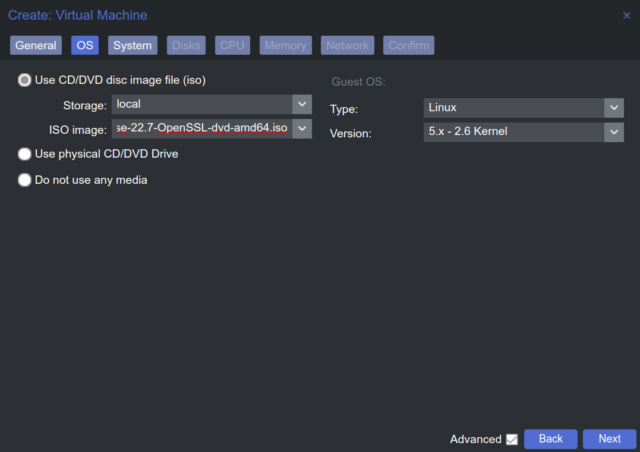
- OS: select yor ISO Image, in this case OPNsense ISO
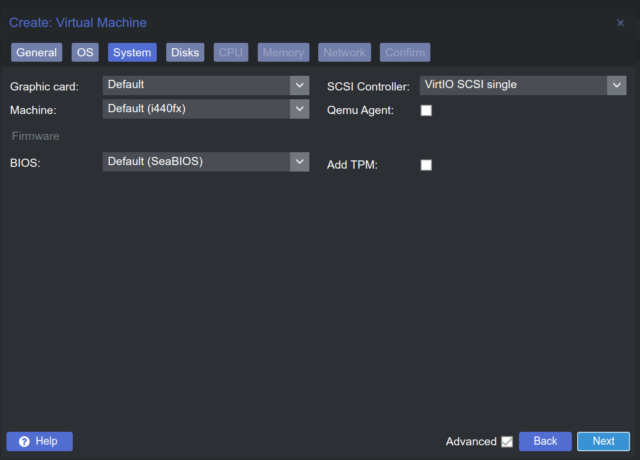
- System: for OPNsense you can check Qemu Agent
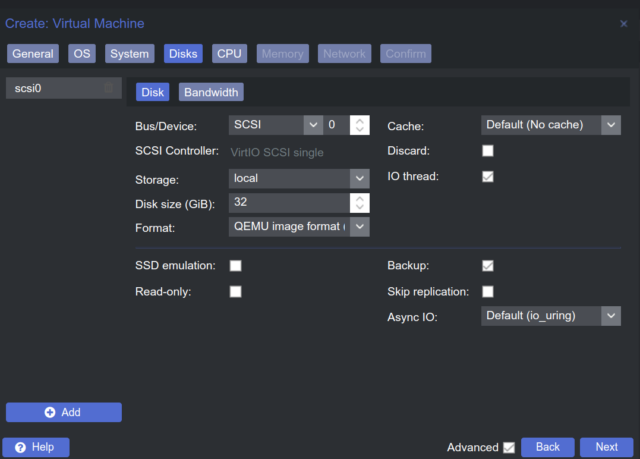
- Disks: Add a Disk for your VM and check IO Thread
- CPU: There are different opinions about how many CPUs and memory should be assigned to the OPNsense.
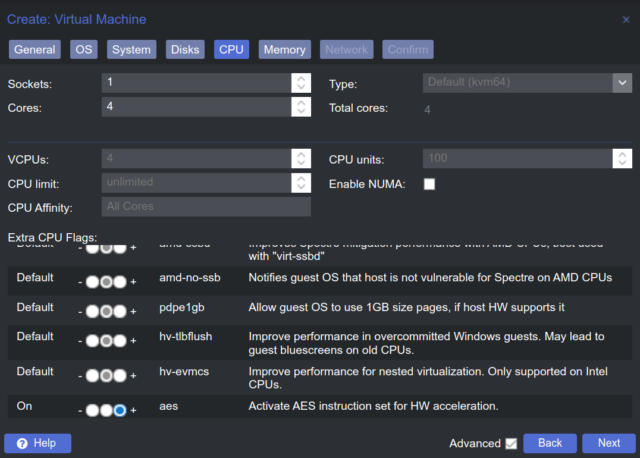
- Decide for yourself afterwards you can always change it.
- Memory: Same as CPU diffrent opinions.
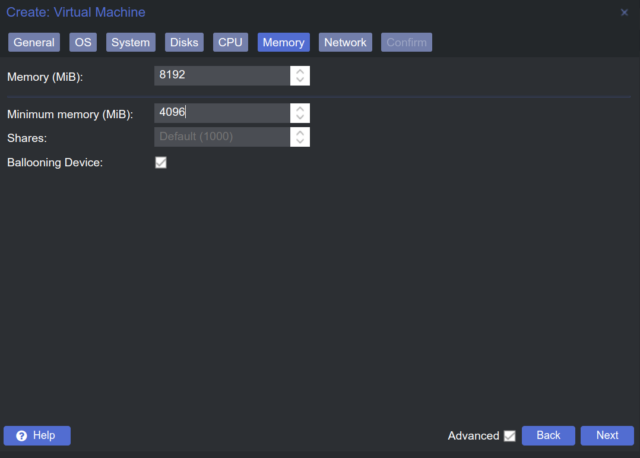
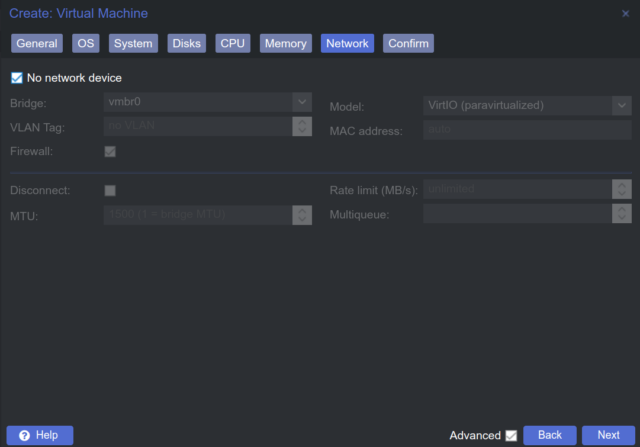
- Network: I have not added a network interface and will do so later.
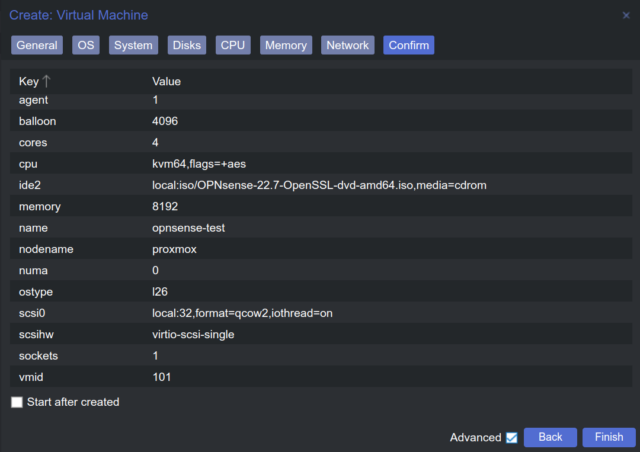
- Confirm: Overview of all specifications.
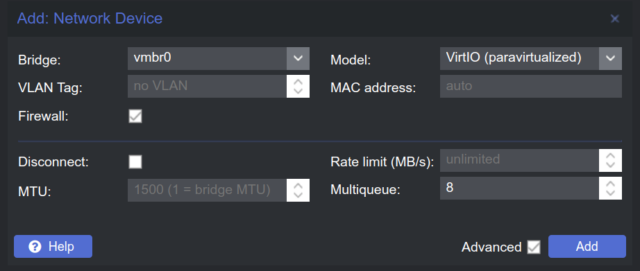
- Hardware / Add / Network Device
- First we add only vmbr0 for WAN Interface
Install OPNSense VM
- Select OPNSense VM and Console then click start now
- If you see this screen login with installer and opnsense
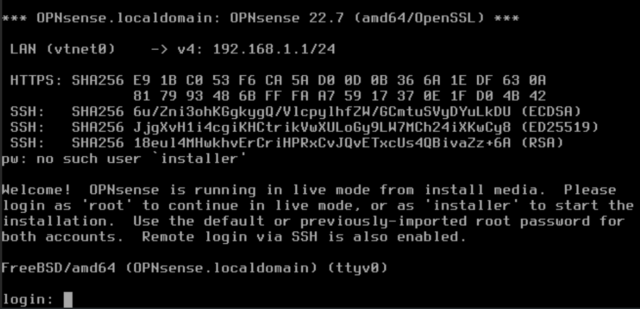
- Now install opnsense, choose your keyboard layout and the desired filesystem. If you have assigned multiple disks to your VM before, you can even use ZFS with mirror or raid function.
- as last point change your root passwort and then reboot opnsense.
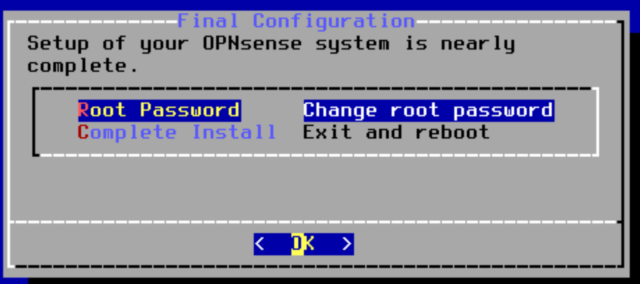
– after reboot you login with root and you password

- after login you see this options
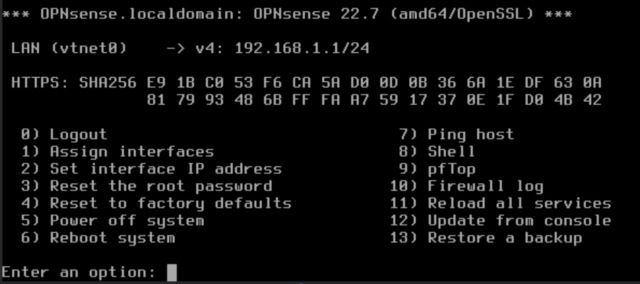
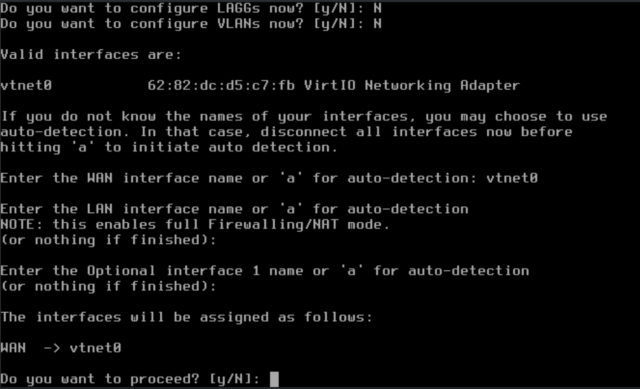
Assign interfaces
- Do you want to configure LAGGs now? N
- Do you want to configure VLANs now? N
- Enter the WAN interface name or ‚a‘ for auto-detection: vtnet0
At this point we do not want to configure a LAN interface. Therefore the next 2 points can be skipped with Enter.
- „Do you want to proceed?“ We answer with Yes
Set interface IP address
- Configure IPv4 address WAN interface via DHCP? N
- Enter the new WAN IPv4 address. Press ENTER for none:
[SECOND_IPv4]
- Enter the new WAN IPv4 subnet bit count:
32
I take 32 here because no other IP is needed in this WAN.
- For a WAN, enter the new WAN IPv4 upstream gateway address:
[MAIN_IPv4]
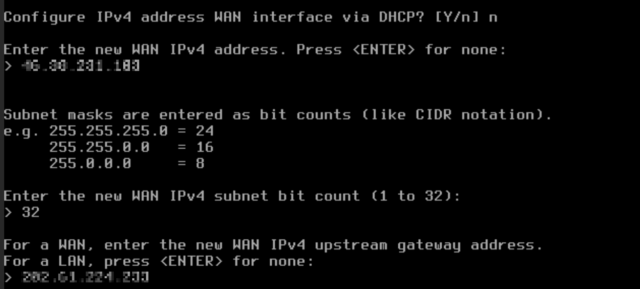
- Questions about name server for WAN and IPv6 answer with N or Enter.
-
Set the GUI to https
- Add self signed certificate
- Reset the gui values to default.
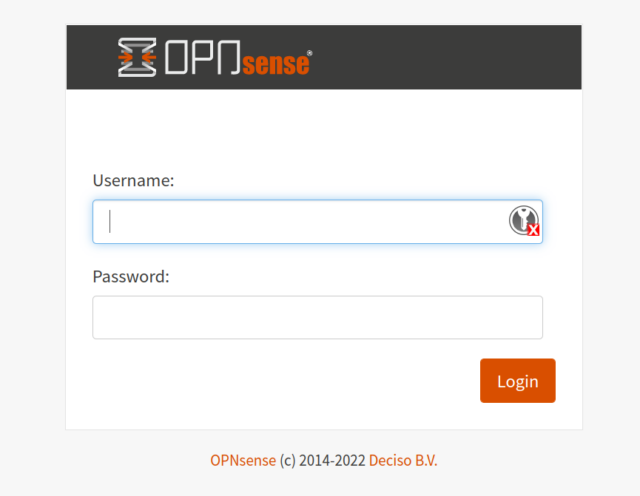
Now you can call your OPNsense GUI in your Browser.
[Second_IPv4:443]
Securing Proxmox and OPNsense with 2FA (TOTP)
Since only one interface has been created so far, the interface should be directly accessible on the [Second_IPv4]. Unfortunately this makes some security measures necessary.
Therefore, I would like to bring this forward and only then proceed with all further steps for setting up the OPNsense and setting up first VMs under Proxmox.
Proxmox 2FA
Setting up 2FA under Proxmox is really easy. Just add a user under Datacenter : Permissions : Two Factor with Add / TOTP.
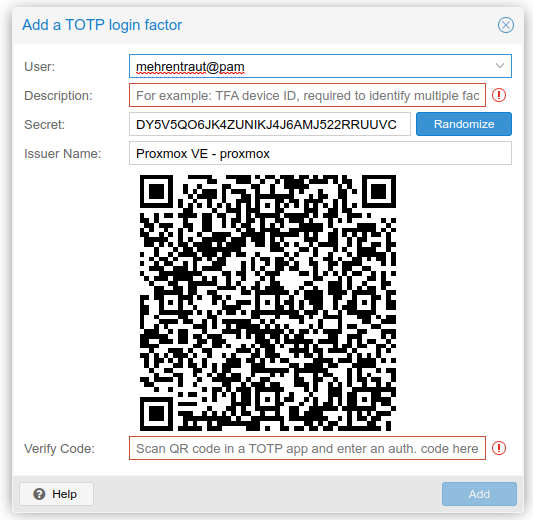
You have now the possibility to add your 2FA either with the QR Code or with the Secret (the QR Code shown in the picture is not valid anymore).
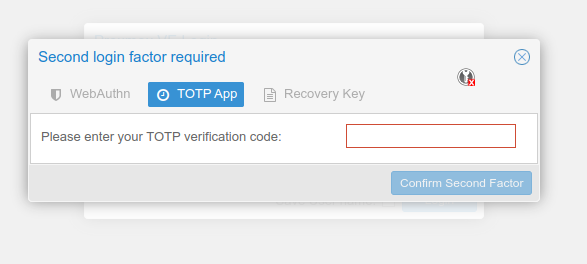
After that you will be asked for the second factor when logging in.
OPNsense 2FA
At 2FA for OPNsense you can find a very good tutorial on how to enable 2FA under OPNsense.
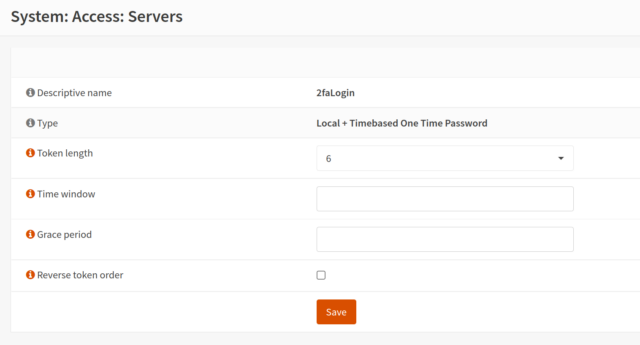
Then you just need to create an appropriate secret at the user and connect to your app via QR code or secret.

After that you have to make the right server the default server for the login. You can find this under Settings : Administration : Authentication.

If you did everything right then Proxmox and OPNsense are now provided with a 2FA via TOTP and should be reasonably secure even if you are directly reachable from the network.
